Git is one of the most popular version control tools. Every software developer should have a basic knowledge of git and it plays an important role in the day to day programming. I can’t imagine a day of a software developer without using git and its features while working with a team. There are so many commands provided by git. In this post, I will go through a few of the most commonly used git commands in day-to-day programming.
Let’s get started…
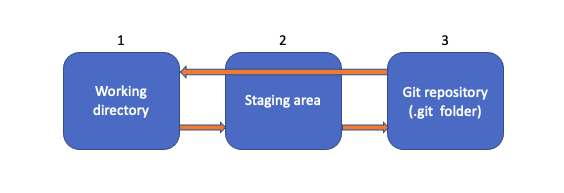
Prerequisites: Before diving into the git commands, let us understand the 3 states of git.
1. Working directory: This contains all the files/folders in the projects. We can modify the files/folders of the project. The files/folders may or many not be managed by git, but git is aware of it
2. Staging area: This contains the files/folders that we wish to be committed
3. Git repository(committed state): This manages the git commit history. The committed changes are stored in the .git directory.
With the above basic knowledge, let us start with the basic git commands.
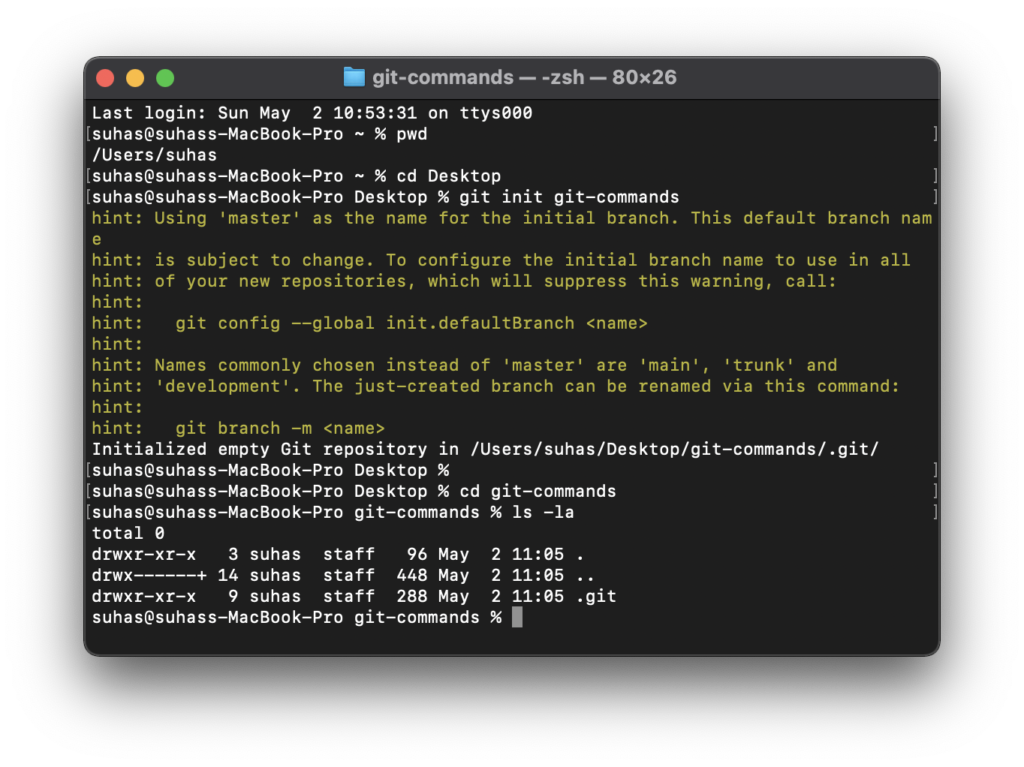
- 1. Git init:
Create a new folder at the location where you wish to have your project. In order to start managing it with git, all we have to do is just run ‘git init‘ command. Git will create a.gitfolder inside this folder
- 2. Git config: The ‘
git config'command is used to set various git configurations that are used on global or local project levels. Let us add the username and email to the git config file. We can confirm this by runninggit config --global --listgit config --global user.name "suhas"git config --global user.email "suhasmadnanth@gmail.com"

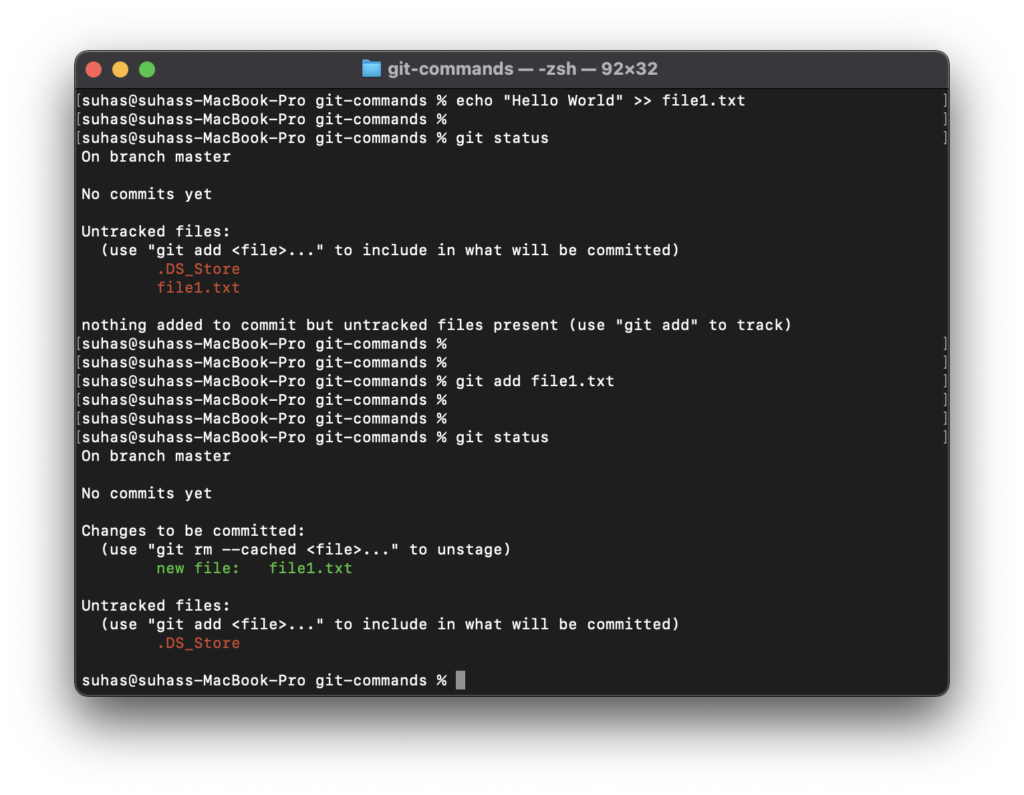
- 3. Git status: ‘
git status‘ command is used to check the status of the files/folders that were modified in the working directory. The modified files were listed in the red color
- 4. Git add: ‘
git add‘ command is used to add the modified files in the working directory to the staging area. Adding files to the staging area means that these files are ready to be committed.
Let us add a new file to the working directory and add this file to the staging area using the git add command. The added files are listed in green when we check thegit status
If you wish to add all the files to the staging area, then u can usegit add .
But there are times where we do not want to add all the files and add only specific files. To ignore some of the files, we could make use of the .ignore git feature which I will cover in the later section.echo "Hello World" >> file1.txtgit add file1.txt
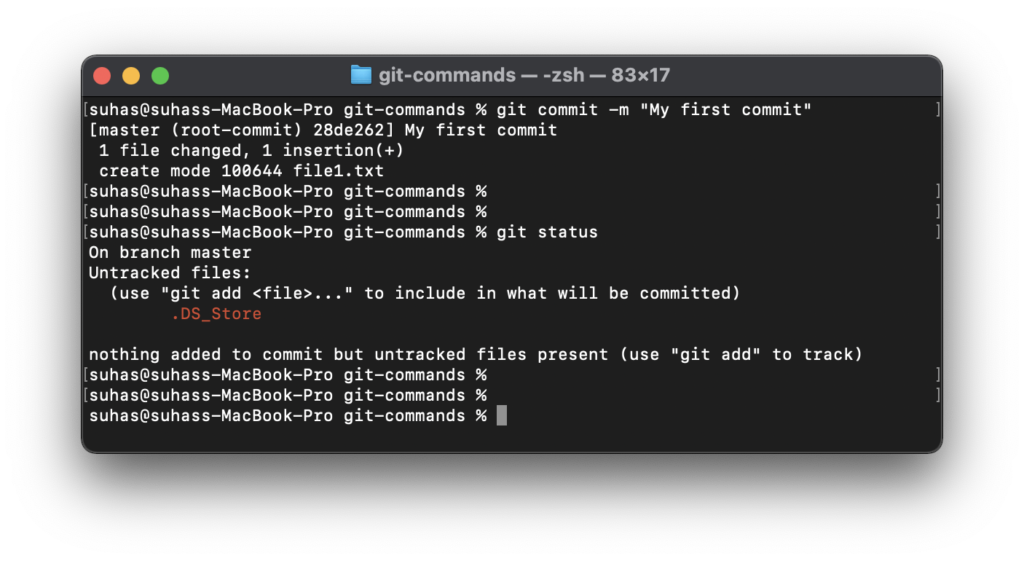
- 5. Git commit: To save the changes, we can use the ‘
git commit‘ command. When we run the ‘git commit‘, it will open the default text editor and we need to enter the commit message. We can also enter the comment message inline by using'-m'option provided by the git. Once the files are committed, we can run thegit statusto check the status of the working directory.
- 6. Git reset: If you want to revert your changes, you can use ‘
git reset‘ command. This can be used in 3 modes. Hard, soft and mixed.
1. Hard reset:git reset --hard HEADwill reset everything. This will point to the latest committed change.
2. Soft reset:git reset --soft HEAD~3will not change the index or the contents in the working directory. It just resets the HEAD to a specified commit.
3. Mixed reset:git reset --mixed HEADwill change the index and also move the contents of the modified files from the staging area to the working directory. We need to do a git add filenames to add the files to the staging area.
- 7. Git log: To check the history of the various commits, we can use
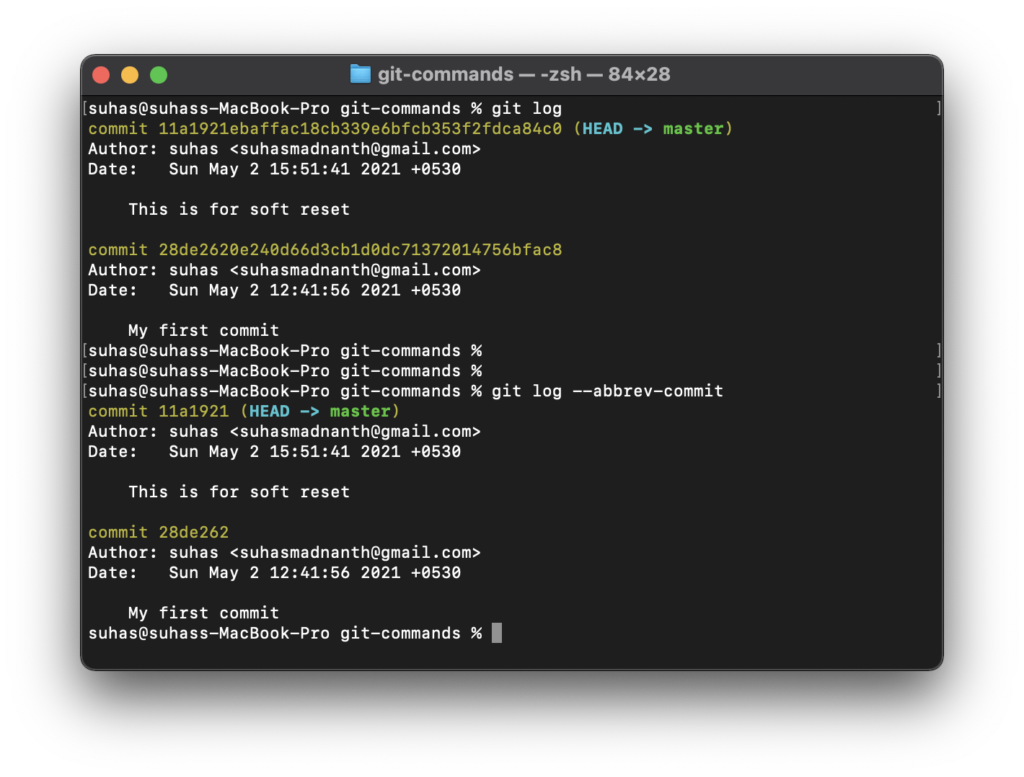
git logcommand. The output contains the commit id, author, date, and the commit message. By default the commit id will be long. To get a smaller commit id, we can run thegit log --abbrev-committo get a unique but smaller commit id.
- 8. Git alias: Wee can shorten the long git commands using git alias. This will improve efficiency by reducing the number of keystrokes. For example, if the command is
git log --all --oneline --graph --decorate, this can be reduced by creating the alias of the long command with the help of git configuration.git config --global alias.history "log --all --oneline --graph --decorate"git historywill output the same result as the previous command.
- 9. Git ignore: There are times that few files may contain the user password or an API key which are required for the feature to work, but you don’t want to commit the changes present in those files. There are also times that there are some Operating System specific hidden files(.DS_Store in case of macOS) which you don’t want to commit. These files can be ignored from committing using the
git ignorecommand
Check if the git repository has a file called .gitignore already present. If it is not there, create a .gitignore file.
This is just a text file where we can add any files, patterns, or folders that we want git to ignore for tracking.
Let us add .DS_Store file in the .gitignore file. Once added, we can run thegit statuswhich will show that the .gitignore file is added and it will not show .DS_Store anymore.
Now we can git add the .gitignore file and create a commit.
From now on git will not track the files/folders that were added in the .gitignore file
- 10. Git clone: When we are working in a team and we have a remote repository, we can clone the project using the
git clonecommand. We can just pass the https url or ssh url.git clone <https-url/ssh-url> - 11. Git push: Once we clone the remote repository and we made the changes locally, we can commit the changes. Then we can push the commit to the remote repository using a
git pushcommand
Starting from Oct 2020, the master branch in the remote repository is renamed to main.git push -u origin mainwill push the code to the remote repository
- 12. Git fetch: The
git fetchcommand is used to download the new branches that are created on the remote repository. - 13. Git pull: The
git pullcommand is used to download new data from the remote repository to a local repository. - 14. Git branch: The git branch is used for branching operations like listing, deleting, and creating new branches.
To list just the remote branches, we could usegit branch -r
To list all the branches, we could usegit branch -a
To create a new local branch, we can do withgit branch branch_name
To delete a local branch, we can dogit branch -d branch_name - 15. Git checkout: We can use
git checkoutcommand to move to a different branch.git checkout new_branch - 16. Git stash: There might be a time where we are working on branch1 and there comes an urgent issue where we need to checkout to a different branch say branch2 and provide the bugfix. In such situations, we could do a
git stashto park the changes aside. We can checkout to branch2 and make the required changes. Once the changes are done, we can then switch back to branch1 and apply the stash to continue working on the previous task.
To apply the stash, we can just rungit stash apply
When working with multiple branches we might end up with multiple stashes. In those cases, we can stash the current changes using a message likegit stash save "message1"
When we want to apply the stash, we can check the required stash using thegit stash listwhich provides the index of the stash.
We can then apply the stash using the index likegit stash apply stash@{index} - 17. Git commit amend: If you want to edit the last commit message or rectify minor things in the previous commit, you can amend the previous commit using
git commit --amendcommand instead of creating another commit for a small change. This will open the text editor where you can edit the message of your previous commit. Additionally you can add the commit message inline using the-mflag likegit commit --amend-m “updated commit message”


Awesome !!! Good knowledge gain…